10 Product Photography Techniques That Experts Use In 2024
In the world of product photography, mastering the art isn’t just about clicking images; it’s about telling stories, creating desire, and ultimately driving sales. Whether you’re a seasoned professional or just starting out, jumping into the world of product photography requires a sharp eye, some technical knowledge of product photography techniques, and a touch of creativity.
Behind every stunning product image lies many product photography techniques and secrets used by the photographer to upgrade their work to the next level. In this guide, we’ll tell you the essential product photography tips and tricks shared by these seasoned professionals, helping you with the knowledge and skills needed to do amazing work in the field of product photography.
Top 10 Product Photography Techniques Used by Experts
The exposure triangle is made up of three key parts that control how much light your camera captures: aperture, shutter speed, and ISO. When you adjust these parts properly, you get a well-exposed photo.
These three parts of the exposure triangle work together. If you change one, you might need to change another to keep the exposure right. Sometimes, photographers call it the photography triangle or camera triangle too.
Aperture, shutter speed, and ISO aren’t just about exposure, though. They also affect other things in your photos, like how much of the picture is sharp (depth of field), whether moving objects look blurry (motion blur), and if there’s any graininess in the picture (noise).
1. Background
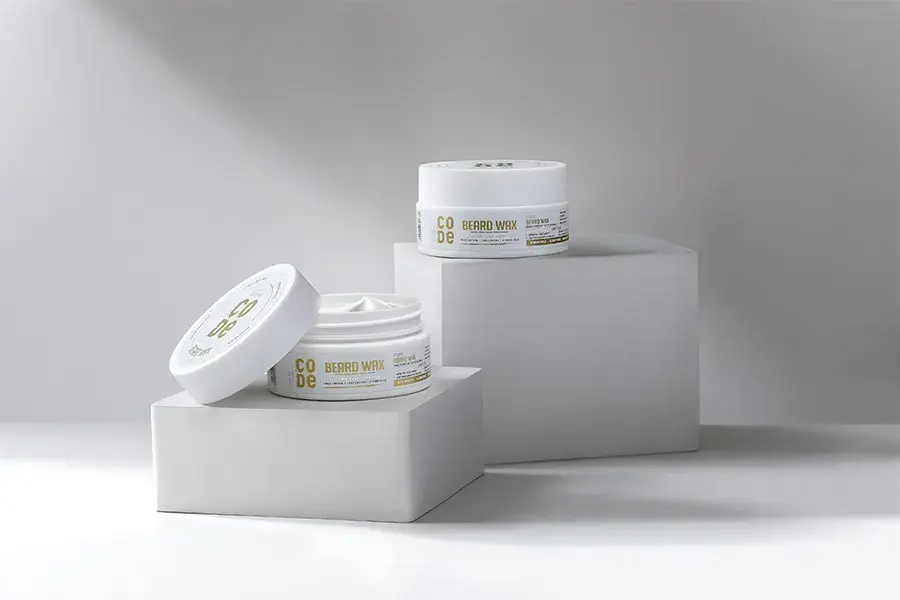
Choose backgrounds that complement your product and enhance its visual appeal. Consider using neutral colors or textures that provide a clean backdrop without distracting from the main subject. Avoid cluttered or busy backgrounds that can detract from the product itself.
When it comes to backgrounds in product photography, simplicity is often key. There are primarily two types of backgrounds commonly used: the classic plain white backdrop and backgrounds that provide context to the product.
- Plain White Background: This timeless choice offers a clean and minimalist look that directs all attention to the product itself. It eliminates distractions, allowing the viewer to focus solely on the item being showcased. The simplicity of a white background is especially popular in e-commerce settings, where products need to stand out clearly and consistently.
- Backgrounds with Context: Sometimes, incorporating a background that complements or contextualizes the product can enhance its visual appeal. For example, a kitchen appliance might be photographed against a backdrop of a modern kitchen to illustrate its practical use and fit within a home environment. This approach adds depth and storytelling to the image, helping viewers imagine the product in real-life scenarios.
2. Focus On Branding Elements

The second in line of top product photography techniques is adding branding elements such as logos, packaging, or brand colors into your product photos to strengthen brand identity and recognition. Consistency in branding across your product images helps strengthen brand association and builds trust with your audience.
For example:-
Let’s consider a fictional company called “Nature’s Essence,” specializing in organic skincare products. When photographing their line of facial creams, several branding elements can be strategically integrated:-
- Logo Placement: Ensure the company’s logo is visible either on the product packaging or subtly incorporated into the background of the image. For instance, the logo could be embossed on the cream jar lid or featured as a watermark in the corner of the photograph.
- Color Palette: Nature’s Essence may have a distinct color palette associated with its brand, such as earthy tones and soft greens to evoke a natural and organic feel. Incorporating these colors into the background or props used in the photograph reinforces brand consistency and identity.
- Typography: Utilize fonts and typography consistent with the brand’s style guide for any text or captions included in the imagery. This ensures that the textual elements seamlessly align with the overall brand aesthetic.
3. Optimize For E-commerce
If you’re shooting product photos for an e-commerce website, make sure your images meet the platform’s requirements. This includes using high-resolution images, providing multiple angles and views of the product, and ensuring accurate color representation. Consistent and well-optimized product images can improve conversion rates and customer satisfaction.
Now you must be wondering why you should do it. You should do it because optimizing product pictures for e-commerce offers several key benefits:
- Increased Sales: High-quality, visually appealing images attract more potential customers and lead to higher conversion rates, ultimately driving sales.
- Improved User Experience: Clear, well-optimized images enhance the overall shopping experience, helping customers make informed purchasing decisions and reducing the likelihood of returns.
- Enhanced Brand Perception: Professional-looking product photos instill trust and credibility in your brand, positioning it as reliable and reputable in the eyes of consumers.
- Better Search Visibility: Optimized images improve search engine rankings, making it easier for potential customers to find your products online and boosting your e-commerce website’s visibility.
- Mobile Compatibility: With the growing prevalence of mobile shopping, optimized images ensure that your products look great and load quickly on various devices, catering to the needs of mobile shoppers.
4. Test Different Setups And Angles
Don’t be afraid to experiment with different setups, angles, and compositions to find the most flattering and compelling shots of your product. Take test shots from various perspectives and review them to see what works best. The best product photography technique is to experiment. Keep iterating and refining your approach until you achieve the desired results.
5. Choosing The Perfect Aperture

Picking the right aperture setting is crucial for capturing stunning product photos. Whether you’re shooting in a lifestyle or studio setup, aperture plays a big role. For lifestyle shots, like those showcasing products in real-life settings, go for a wide aperture (lowest f-stop).
This blurs the background, making your product stand out beautifully. But in a studio, where distractions are controlled, a narrower aperture is ideal to keep everything in sharp focus. Just remember, lighting matters too!
Wanna learn more about aperture and exposure triangle? Check out our premium video for in-depth learning: How Camera Works
6. Use Telephoto Lens
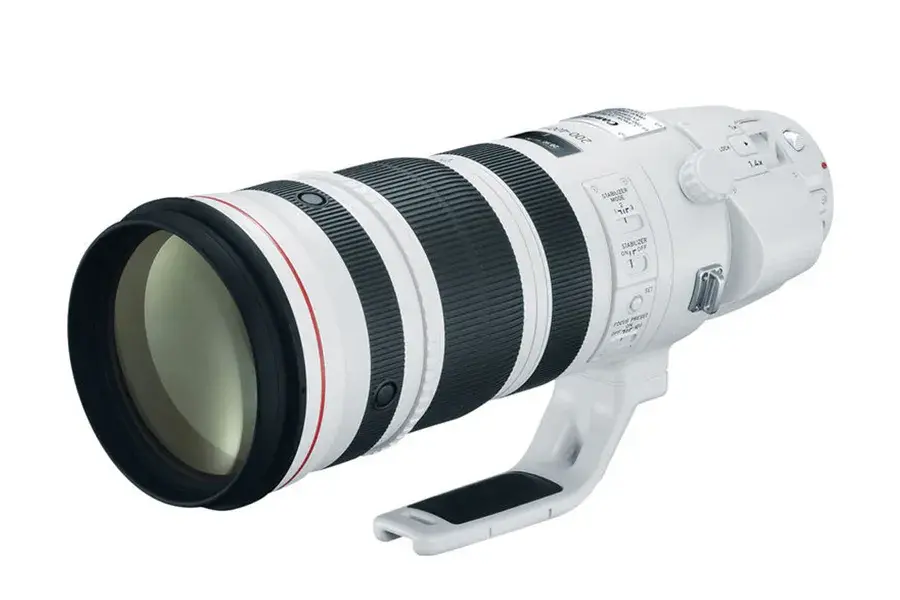
Using the right lens is key to preventing any distortion in your product photos. Wide-angle lenses can sometimes warp the subject’s proportions. Stick to shorter telephoto lenses or macro lenses to capture your products accurately.
The best focal length for product photography falls between 85mm and 145mm. These lenses maintain the natural look of your products, ensuring they look just as amazing in photos as they do in person.
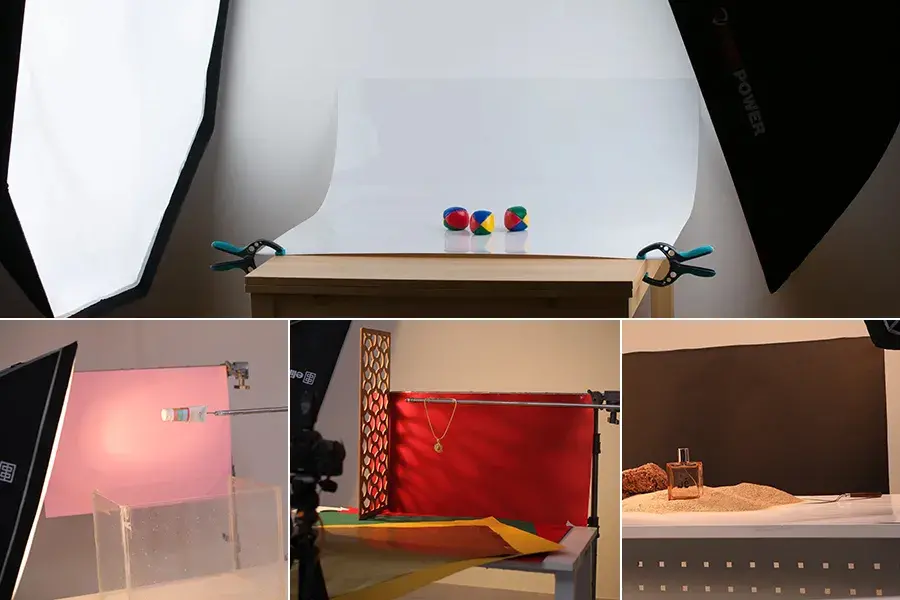
7. Mastering Product Lighting
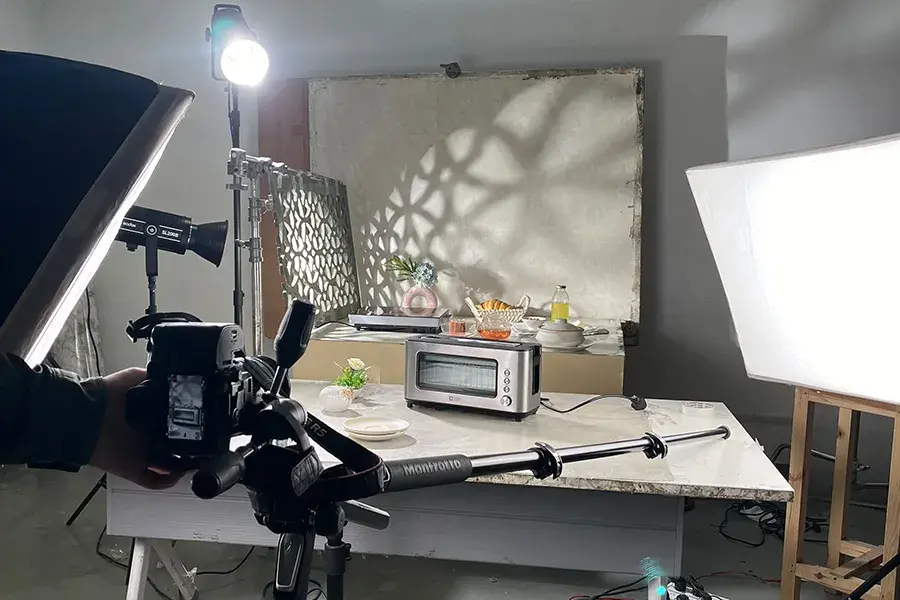
Now, this has to be on the list of top product photography tips and tricks. Lighting is everything in product photography. It’s all about creating a beautifully lit space that highlights your product while keeping the background subtle.
Soft light is your best friend here, achieved through modifiers like softboxes and reflectors. These tools help evenly illuminate your subject, avoiding harsh shadows that can distract from your product. Remember, diffusing your studio lighting is key to achieving that flawless, professional look.
Want to master lighting? Check out our premium video for in-depth learning by an industry expert: Let’s Explore The Role Of Modular Lighting In Photography
8. Find Inspiration Everywhere
This is one of the best and probably most effective product photography tips. Look around for inspiration in the world of photography. Explore images that catch your eye and dissect what makes them special. It could be a unique angle, captivating lighting, or creative editing technique.
But remember, while inspiration is great, don’t copy someone else’s style. Experiment with different elements to develop your own unique photography style that sets you apart.
9. Tell A Compelling Story
Sell more than just a product, sell a lifestyle. Create a narrative around your product that resonates with your audience. Showcase how it enhances their life or fits into their interests. As photographers, we’re storytellers, tasked with bringing products to life through imagery. So, get creative and craft a story that captivates your audience and leaves them wanting more.
Here are some key elements to consider:
- Context: Provide context for the product by showcasing it in a relevant setting or environment. This helps viewers imagine how the product fits into their lives and enhances its appeal.
- Narrative: Develop a narrative around the product that highlights its features, benefits, and unique selling points. This could involve showcasing the product in use or telling a story that resonates with the target audience.
- Emotion: Evoke emotion through the use of imagery, composition, and lighting. Whether it’s joy, excitement, or nostalgia, tapping into emotions can create a deeper connection with the product and inspire action.
- Lighting: Use lighting to set the mood and enhance the visual impact of the product. Whether it’s soft, diffused light for a cozy atmosphere or dramatic lighting for a more dynamic look, lighting plays a crucial role in storytelling.
- Brand Identity: Incorporate elements of brand identity, such as logos, colors, and fonts, to reinforce brand recognition and create a cohesive visual identity across all product images.
- Lifestyle: Showcasing the product in a lifestyle context helps viewers envision themselves using the product and enjoying its benefits. This can involve portraying aspirational lifestyles or addressing specific pain points that the product solves.

Download The Beginners Handbook For Product Photography
This handbook is your go-to guide for unleashing your creative potential. Don’t miss out – grab your FREE copy now!
10. Harness The Power Of Color Theory
Understanding color psychology can help you create product images that resonate with your audience. Different colors evoke specific emotions and associations, so choose your color schemes wisely. Experiment with complementary or analogous color combinations to create visually appealing photos that draw viewers in and leave a lasting impression.
Ensure your product colors are true to life by paying attention to lighting and white balance. Distorted colors can lead to customer dissatisfaction, so it’s crucial to get them right. Use white photography bulbs and natural light sources to maintain accurate colors. And don’t forget to calibrate your monitor regularly to ensure consistency across devices.
Conclusion
Mastering the art of product photography requires a combination of technical skill, creativity, and attention to detail. In this article, we covered all the product photography tricks and tips you need to know. By following them, you can upgrade your product photography game and create images that attract viewers and drive sales.
From selecting the right aperture and lens to understanding lighting techniques and using color theory, each aspect plays an important role in creating compelling product images. Whether you’re shooting in a studio setting or capturing lifestyle shots, these tips provide valuable guidance for achieving professional results.
Remember, the ultimate product photography technique is to showcase the product in the best possible light and convey its value to potential customers. By implementing these product photography tips and continuously improving your skills, you can effectively tell the story of each product and create images that resonate with your audience. Even after knowing all the product photography techniques, you will require continuous practice to excel in it.
To further enhance your photography skills and gain insights from industry experts, consider joining the Fds Masterclass. Through expert-led instruction and hands-on learning, you can take your photography to the next level and unlock new opportunities in the world of product photography. Join here: FDS Masterclass
FAQs
1. What filter is best for product photography?
The best filter for product photography is usually no filter at all. Filters can alter the colors and appearance of your products, making them look different from reality. It’s best to use natural lighting and minimal editing to capture the true colors and details of your products.
2. How can I make my product photos look better?
To make your product photos look better, try these tips:
- Use natural lighting: Natural light is the most flattering for products.
- Use a clean, simple background: A plain background helps your product stand out.
- Use a tripod: A steady camera reduces blurriness.
- Edit carefully: Use editing software to adjust brightness, contrast, and sharpness, but avoid over-editing.
3. What is the super common edit for product photos?
The most common edit for product photos is probably adjusting the brightness and contrast. This helps make the products look more vibrant and appealing. Other common edits include cropping, straightening, and removing blemishes.