Beginner’s Guide to Product Photography Lighting Setup
Product photography is the backbone of online sales, in the present era of digital branding, product photography is essential for attracting customers and ultimately driving sales. High-definition cameras and skilful photo editing can uplift a normal photograph, lighting plays an essential role in executing visually appealing product photographs.
Whether you are a professional photographer or a beginner who wants to learn and master product photography, mastering product photography lighting techniques can upgrade your product photography to the next level.
Here is an important fact if you fail to execute your lighting correctly, no expensive camera and high-definition lenses can make your photographs stand out. But invest your time and money in implementing the science of lighting effectively. There will be no barrier between capturing beautiful product images, irrespective of what camera you are using.
In this blog, you will dive deep into the world of product photography, lighting setup and how you can set up a portable photography studio.
Lighting Tips for Pre-Production
Without implementing proper pre-production activities, you will be confused and fumbling in the dark, throwing anything and everything at the wall in the hope that something will work and turn into a good product photo shoot. It’s not the case in planning a pre-production phase. It will take all the guesswork and doubts away as it creates a pre-planned blueprint for executing the photo shoot.
In the Pre-Production phase, you will plan the photoshoot idea of where the shoot is to be done, what backdrops are to be used, and what is the idea behind the shoot. Also what shots are to be kept in priority according to the product and its category?
Your product photography lighting setup depends on the type of product you want to shoot. Professional photographers use different types of lighting for different types of products like food photography and restaurant shoots, skin care products, home furnishings such as carpets, sofas, tables, curtains, and many more. Understanding the physical characteristics of the product you plan to photograph will help you decide the type of lighting you will need.
Once you understand the product, its category, and its usage, you must spend some time with the product and visualize it for instance:
- Watch your product thoroughly, all its dimensions, the material of the product, its shape, and its focused target. Depending on all these aspects you can decide your lighting setup.
- Where will the product be shot with more efficiency, outdoors or in the studio?
- Decide the backdrops, props, and other required things that should go well with the product you are photographing.
Best Lights for Product Photography
Selecting the right lighting for your product photoshoot should be strategic and well thought out, as it is crucial for executing professional-quality results. Here are some most commonly used lighting setups for product photography:
Strobe lights
Strobe lights are used to create an aesthetic dynamic effect to your photoshoot. Strobe lights are also called flashlights in conversational terms. It is used to produce short bursts of intense light, allowing photographers to freeze motion and capture crisp, high-quality images. Strobe lights are multitaskers in your studio that can take all the work in their hands. It can be used as a key light, a continuous light source, and as a creative lighting.

Download The Beginners Handbook For Product Photography
This handbook is your go-to guide for unleashing your creative potential. Don’t miss out – grab your FREE copy now!
Ring lights
Ring lights are the most commonly known type of light. They became super popular in the last few years as every social media influencer used to show them in their entertaining content, although ring lights are just not limited to TikTok.
Yes, they are good in portrait photography and videography but in product photography, it’s even better. It provides shadowless product photos and also highlights certain features of the product.
Learn how to use them better in product photography here: How To Use Ring Light For Product Photography
Natural Light
Even though artificial light is often recommended for its consistency and controllability, natural light can provide amazing photographs. For certain products outdoor shoots are preferred like sunglasses and some sort of jewellery, the golden hour can provide a soft light to enhance photo quality.
Product Photography Lighting Techniques
In product photography, it is much more about the techniques than it’s about the equipment. Lighting techniques are defined as how a product should be presented and how the audience will perceive it. From the dynamic hard shadows to the soft diffusing lights every technique communicates a different brand image. Here are some essential product photography lighting techniques.
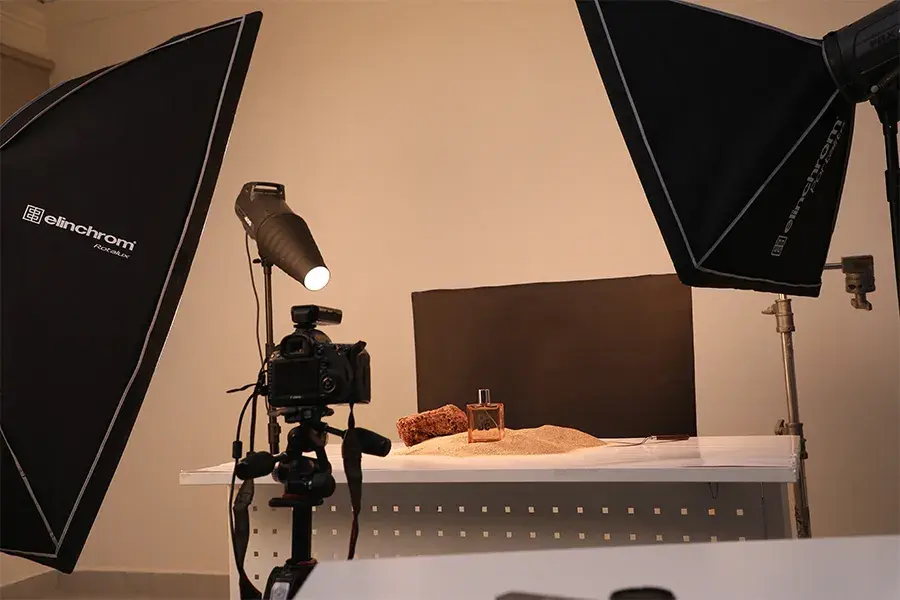
Three-point Lighting
As the name suggests, three-point lighting is a lighting setup in which lights are thrown from three points using three different lights. It is a basic setup used in photography and filmmaking to illuminate a subject evenly and create depth and dimension in the image. The three primary light sources are positioned around the subject: the key light, the fill light, and the backlight.
1. Key light:
Key light is the main source of light and so it is the brightest. It is positioned at a 45-degree angle to the subject and slightly above eye level.
2. Fill light:
Fill light is placed on the opposite side of the key light, and behind the product. Fill light is used to fill in the shadows created by the key light and provide even illumination across the subject’s features.
3. Backlight:
Backlight is also known as rim light and hair light. It is positioned behind the product facing the camera creating depth to the product by adding highlights to its edges.
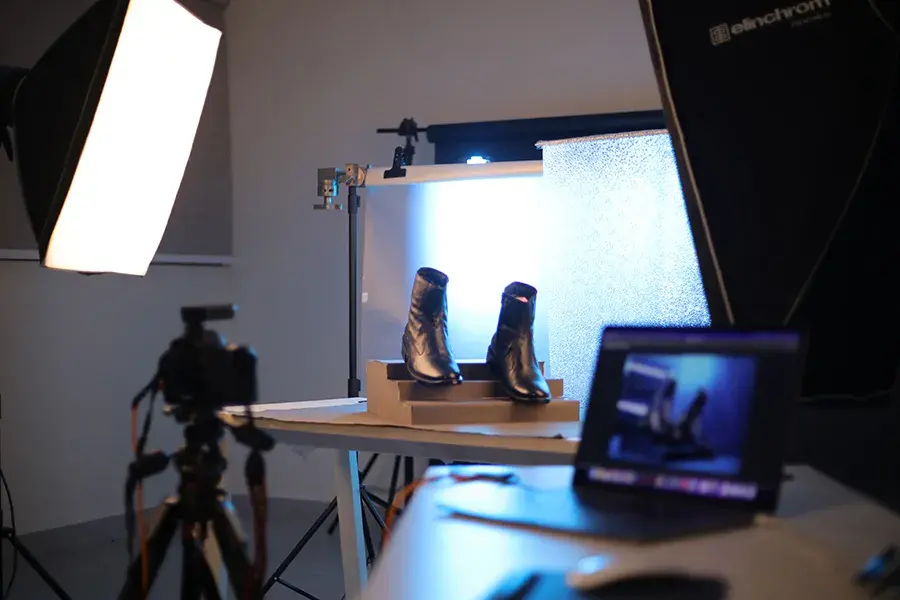
Side Lighting

Light coming from a side and creating depth and highlights, ideal for products with complicated details. It is typically placed at a 90-degree angle to the subject, either to the left or right side it is commonly used to enhance the texture and form of products with complex details or interesting surface patterns, such as textiles, jewellery, and sculptures.
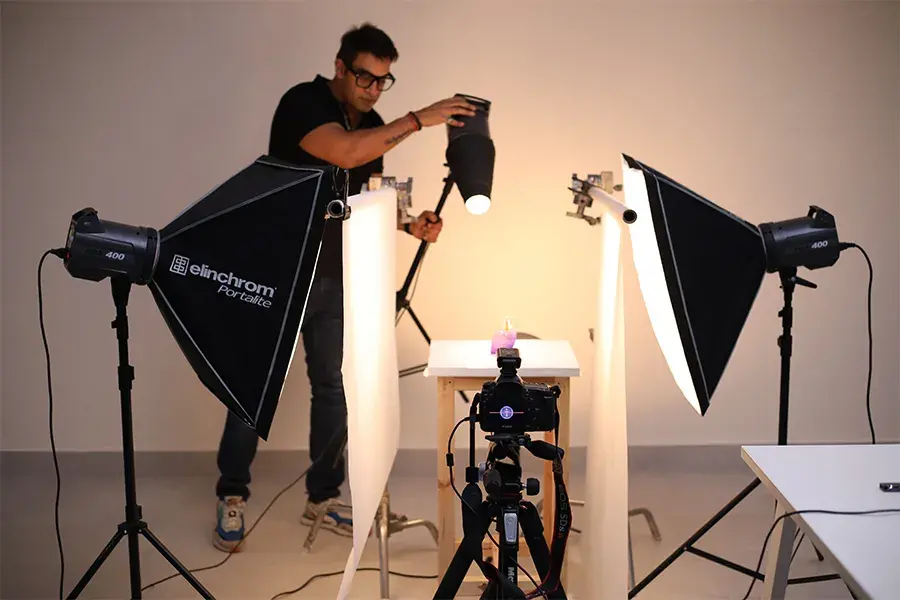
Diffused Lighting
Diffused lighting is achieved using diffusers, it provide soft and even light into the photoshoot. By dispersing the light evenly, diffused lighting reduces the intensity of specific highlights and reflections on shiny or reflective surfaces.
Conclusion
Mastering the art of product photography lighting setup is essential for creating beautiful, and professional-quality images that showcase your products in the best possible light. By understanding the different types of lighting, setting up your lights effectively, and following best practices for achieving professional results, you can elevate your product photography and attract more customers to your brand.
Experiment with different lighting setups, practice regularly and don’t be afraid to get creative to capture the perfect shot. With the right lighting setup and attention to detail, you can create compelling product images that drive sales and leave a lasting impression on your audience.
If you wanna learn more about the use of lighting in product photography, you can check out our practical masterclass on product photography with personalized classes and become an expert today. Start learning now: Online Masterclass on Product Photography with FDS Masterclass.
FAQs
1. What type of lighting is best for product photography?
The best type of lighting for product photography often depends on the specific requirements of the shoot and the desired outcome. However, some common types of lighting setups used in product photography include:
1. Natural Light: Utilizing natural light from sources such as windows or skylights can produce soft, diffused lighting that highlights product details and textures. Natural light is often preferred for capturing products with vibrant colours or intricate details.
2. Continuous Lighting: Continuous lighting involves using constant light sources, such as LED panels or studio lights, to illuminate the product. This type of lighting provides consistent illumination and allows for real-time adjustments to achieve the desired look.
3. Strobe Lighting: Strobe lighting, also known as flash photography, involves using brief bursts of intense light from flash units to illuminate the product. Strobe lighting is often used in studio settings and allows for precise control over light intensity and direction.