Learn Product Photography - Complete Guide in 10 Easy Steps
- Masterclass FDS
- January 8, 2024
- 11:10 am
- No Comments
So, there is a great product, but how do you make people want to buy it? Product Photography is the answer! It is like showing off your product in the best way possible. You take pictures that can be used for lots of things, like:
Showing off the product: This could be on your website, social media, or an online store.
Promoting the product: For things like ads, articles, and presentations to other stores.
Better depiction: Like pictures for packaging or labels.
And guess what? You don’t need a super fancy camera or expensive gadgets to take great pictures! All customers want is to see that your product is good and worth the money. In this article, we’ll tell you all you need to know about product photography and how to learn product photography from the start.
But first things first, before starting to actually learn product photography, let’s see what equipment or tools you need to learn product photography.
What You Need To Learn Product Photography
Let’s break down the 5 important things you need before starting product photography:
1. Space
Your designated space, whether it’s a room or just a table, should be free from any distractions. The distractions can be anything like it can be kids, pets or small external elements that can interfere with your setup.
2. Camera
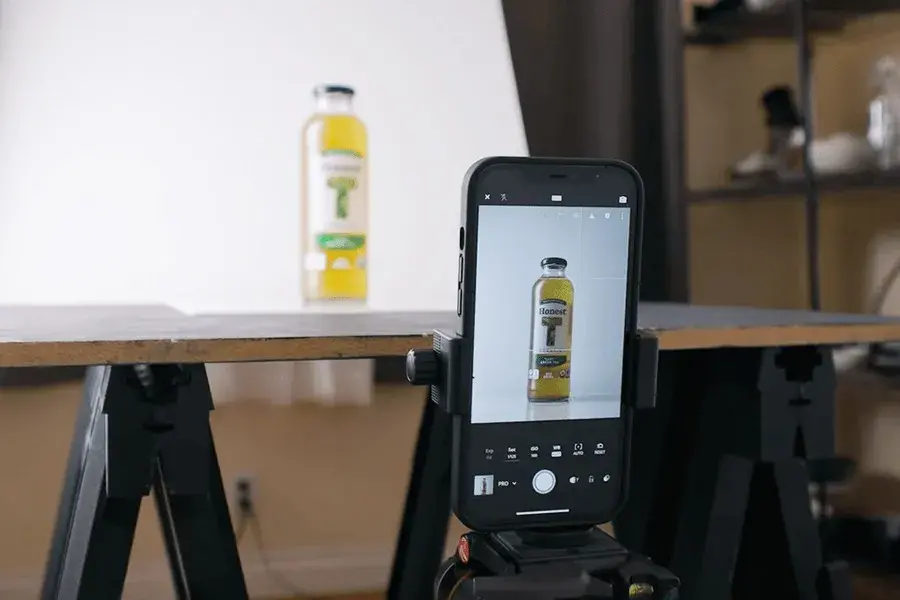
While having a professional camera is excellent (and also suggested), but you can also work with a modern smartphone. Just make sure your smartphone has autofocus and a high megapixel count (8 or more) for capturing detailed and high-quality images.
3. Tripod
Imagine taking a picture of your awesome product, but, oh no, it turns out blurry! That’s where a tripod comes in handy. It keeps your camera or phone steady, preventing those annoying shaky shots. And guess what? Tripods won’t break the bank; you can find affordable ones that do the job just fine.
When you’re shopping for a tripod, consider its size and height. You want one that suits your product and the space where you’re taking pictures. If you’re using a smartphone, make sure the top part of the tripod can securely hold your device. For small products, a pocket-sized tripod is fantastic because it lets you get really close, capturing every detail with precision.
4. Background
Now, let’s talk about backgrounds. The background of your product photo can make a big difference. Here are a few options to consider:
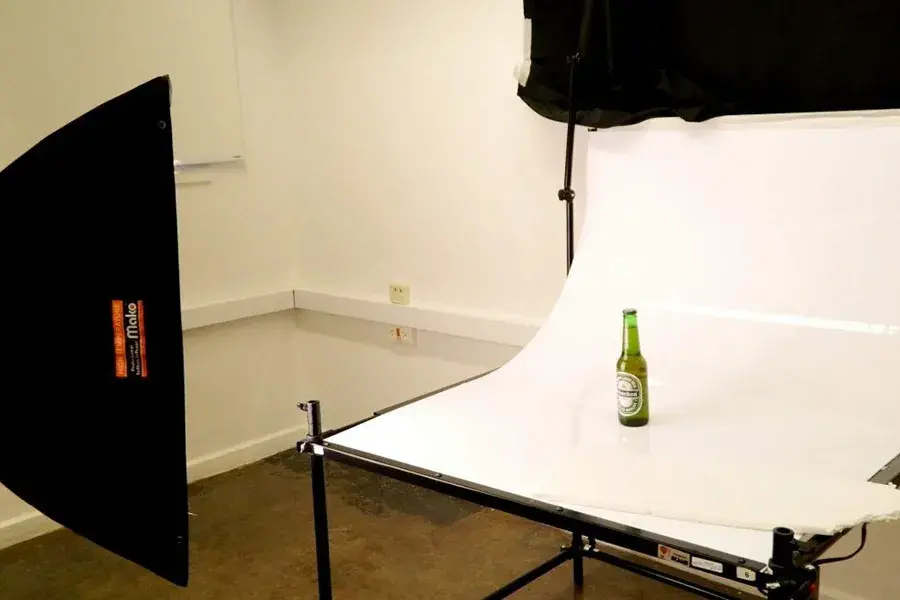
Seamless Background
A seamless background is a white background or any plain background with your chosen colors. You can make it yourself using a curved screen or cardboard placed behind your product. This makes your product look like it’s floating, creating a clean and professional vibe. Bonus—using a seamless background makes it a breeze to remove the background later on using tools like Photoshop.
Horizon Line Background
If you want to add depth to your photos, consider a horizon line background. This is a line where the wall and the surface meet. It gives your pictures a bit more dimension. But beware, it can be a bit tricky if you’re taking lots of photos, as that line needs to match up in every shot.
Lifestyle Background
Want to give your product context? Place it in a real-life situation. For example, showcase kitchen items in a stylish house. You can even include a person in the photo to show the product’s size or how to use it. Just a heads up—adding people or natural light can make your photo setup a bit more complex.
Tip: When using props, keep it simple. You want your product to steal the spotlight, not the accessories.
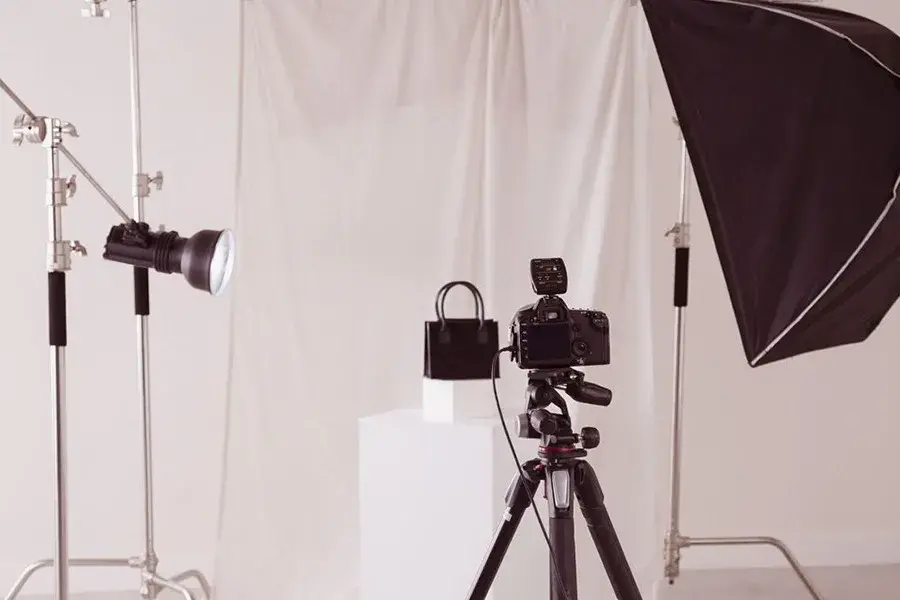
5. Bounce Board
The last basic thing we will talk about before getting on to learn product photography is bounce boards. Ever wondered how to make your product look amazing with soft, gentle lighting? It’s the bounce board’s job! Bouncing light means you’re not dealing with harsh flashes; instead, you’re using a simple trick to create a soft glow around your product.
Now, it might sound a bit technical, but it’s very easy. All you need is something white or reflective—like a piece of cardboard. Place it strategically to catch the light from your flashlight and bounce it onto your product. It helps make your product look its absolute best.
Not sure if that is what you wanted? No worries! Just play around with it. Move the board here and there, take some test shots, and see where you get the most flattering light. Do the mini-experiment to find that perfect glow for your product photos.
Now that you know everything you’ll need to start in the world of product photography, let’s get into the real stuff and see how to learn product photography from the basics.
How To Learn Product Photography?

Download The Beginners Handbook For Product Photography
This handbook is your go-to guide for unleashing your creative potential. Don’t miss out – grab your FREE copy now!
1. Begin with the Basics: Understand Your Camera
Before diving into product photography, get to know your camera. Whether it’s a smartphone or a DSLR, learn the basics of settings like focus, exposure, and white balance. Don’t worry; you don’t need the fanciest equipment to start – even a smartphone can produce fantastic results.
Wanna learn more? You can start from here: How camera works
2. Mastering the Art of Lighting
Lighting is a game-changer in photography. Natural light works wonders for beginners. Start by experimenting with different times of the day and find a well-lit spot near a window. If you’re feeling more adventurous, you can explore affordable lighting kits or even create a DIY lightbox for consistent and controlled lighting.
3. Preparing Your Workspace
Creating a dedicated workspace for your product photography is important. Whether it’s a table, a shooting area, or a simple backdrop, having a fixed spot helps maintain consistency in your photos. A clean, clutter-free space ensures the focus remains on your product.
4. The Magic of Backgrounds and Surfaces
Choose backgrounds wisely to improve your product presentation. White backgrounds are versatile and popular for e-commerce, but you can experiment with different colours and textures to add character. Use household items like poster boards, fabrics, or even a well-ironed bedsheet for your background.
5. Composition Techniques
Next in learning product photography is composition. Understanding composition is key to creating visually attractive product photos. Explore techniques like the rule of thirds, framing, and symmetry. Play around with angles to find the most positive perspective for your products.
Wanna learn how can you get creative with your composition, you can start from here: creative product photography
6. Editing
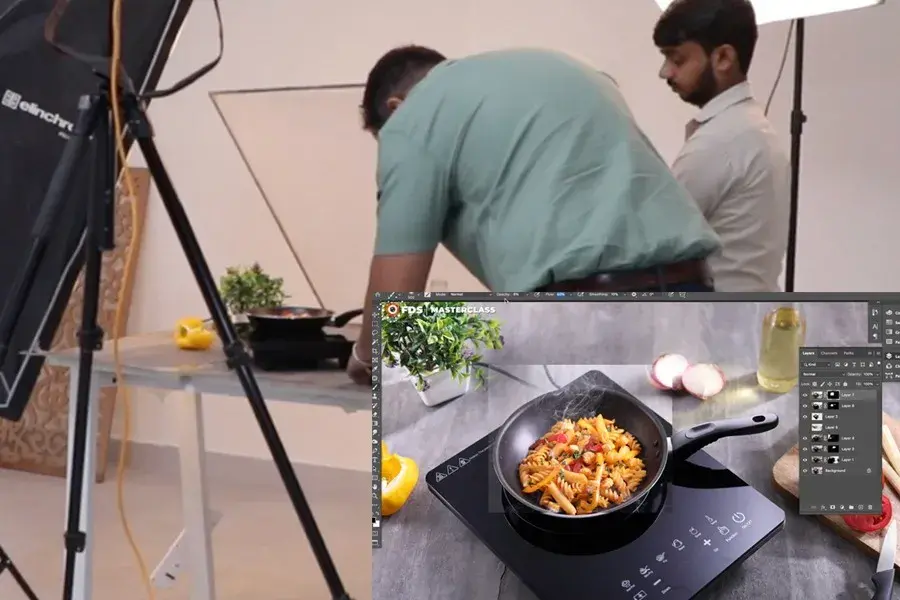
Editing improves your photos, even if it’s just adjusting brightness and contrast. Experiment with free tools like GIMP or beginner-friendly apps like Snapseed. As you progress, you can explore more advanced software like Adobe Lightroom or Adobe Photoshop.
7. Consistency is the Key
Consistency is crucial in product photography, especially if you’re aiming for a professional look. Keep your style, lighting, and backgrounds consistent across your product shots. This creates a cohesive and visually appealing collection.
8. Learn from Others
Engage with fellow photography enthusiasts. Join online forums, participate in social media groups, and attend local meet-ups. Learning from others’ experiences, sharing tips, and receiving constructive feedback can greatly boost your growth as a product photographer.
Don’t know where you can connect with fellow photographers from which you can connect and learn? No worries, you can join our photography enthusiast community for Free here: community Offer
9. Practice, Practice, Practice
There’s no substitute for hands-on experience. The more you practice, the more confident you become. Experiment with different products, lighting setups, and compositions. Don’t be afraid to make mistakes; they’re valuable lessons on your journey to mastery.
10. Seek Inspiration and Stay Curious
The last thing on the list of learning product photography is staying curious. Constantly seek inspiration from professional product photographers. Analyze their work, understand their techniques, and adapt them to your style. Stay curious, explore new trends, and remain open to evolving your skills.
So, are you ready now to jump into the world of product photography? The greatest tip is the simplest one, just keep clicking and stay curious.
And if you want to speed up your learning process and want to make a career in product photography, you can join our FDS Masterclass, where our Mentor, Manish Soni with more than 20 years of experience will teach you the complete product photography from basics to creative techniques and that’s not all, you will learn how can you pitch your dream clients and convert them and eventually start your own business in product photography. Don’t wait anymore, join now: FDS Masterclass