Most Useful Composition Techniques In Product Photography
If you find it tricky to set up your product photos, don’t worry! We’ve got you covered. Here, we’ll share some of our favourite techniques and tips to help you arrange your products better.
In product photography, the aim is to make the item look amazing. Composition is like a magic trick to guide the viewer’s eyes, show off the main thing, and tell a story with the picture – all making your product even more attractive.
And guess what? These techniques and tips work for any product you’re taking pictures of. So, no matter what you’re snapping, these ideas will come in handy! So, let’s get going,
5 Most Useful Composition Techniques For Product Photography
Creating beautiful product images is important, especially when you’re new to product photography. To help you get started, we’ve put together a list of straightforward composition techniques that will surely help you in creating high-quality images.
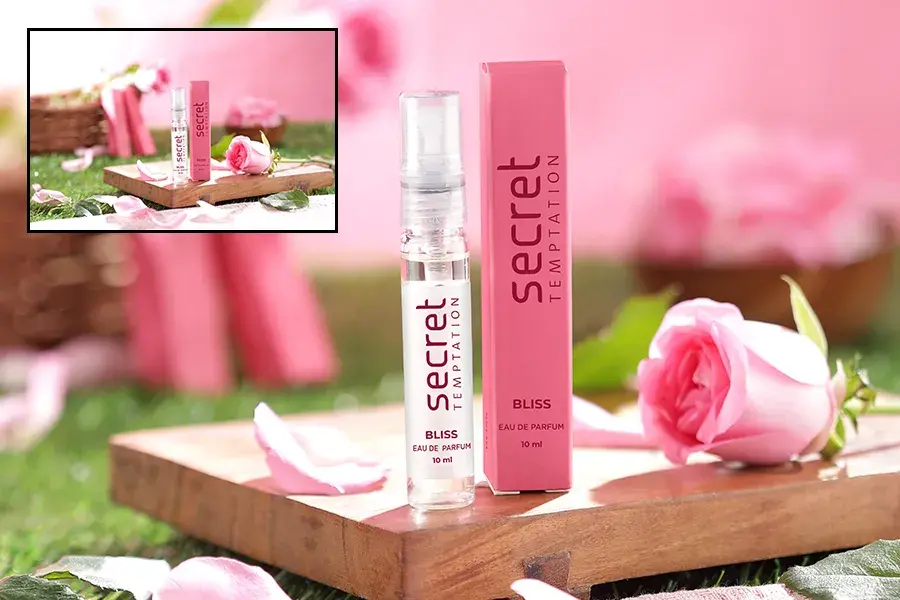
Framing

To make your products catch the eye of potential customers, it’s important to use various design techniques. One of these effective methods is framing, it helps a lot in making attention-grabbing images to highlight your product. Framing can be said to use elements within the photo to direct the viewer’s focus towards the subject.
By using framing in your product photography, you can introduce depth and dimension to your photos while highlighting your product. To apply framing, think about the type of frame that would improve each shot. Look for doorways, windows, or other architectural features that can act as natural frames. This simple yet powerful technique can greatly improve the visual appeal of your product photos.
Rule Of Thirds

Capturing a product’s best features in a visually pleasing manner is the heart of product photography. One helpful technique for achieving this is the rule of thirds. This approach involves dividing your image into nine equal parts using two horizontal and two vertical lines that cross at four points. Placing your subject or product at one of these intersections improves the visual appeal and creates a balanced composition.
To effectively apply the rule of thirds in product photography, start by finding the primary focal point of your image. It could be the product itself, its packaging, or brand elements. Once you’ve pinpointed the focal point, position it along one of the vertical or horizontal lines, or at the intersections. This planned placement contributes to the necessary sense of balance and symmetry in your image, making it a more beautiful composition.
Leading Lines
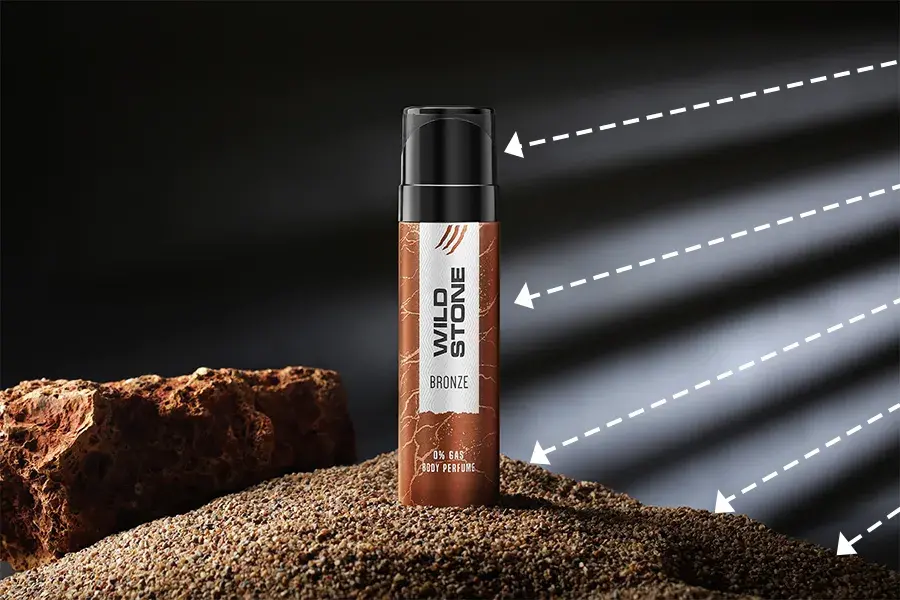
Using leading lines is a handy technique to make your photos look better and give viewers an interesting experience. Leading lines are lines in a picture that guide the viewer’s eyes to a particular spot, making the photo feel like it’s in motion.
To use leading lines well in product photography, think about where and how you place your subject. You might use slanted lines, like diagonals, to add excitement by putting your subject at an angle or using things like arrows or roads. On the other hand, you can go for straight horizontal or vertical lines to make your photo look balanced and highlight specific features of your product.
Symmetry And Asymmetry
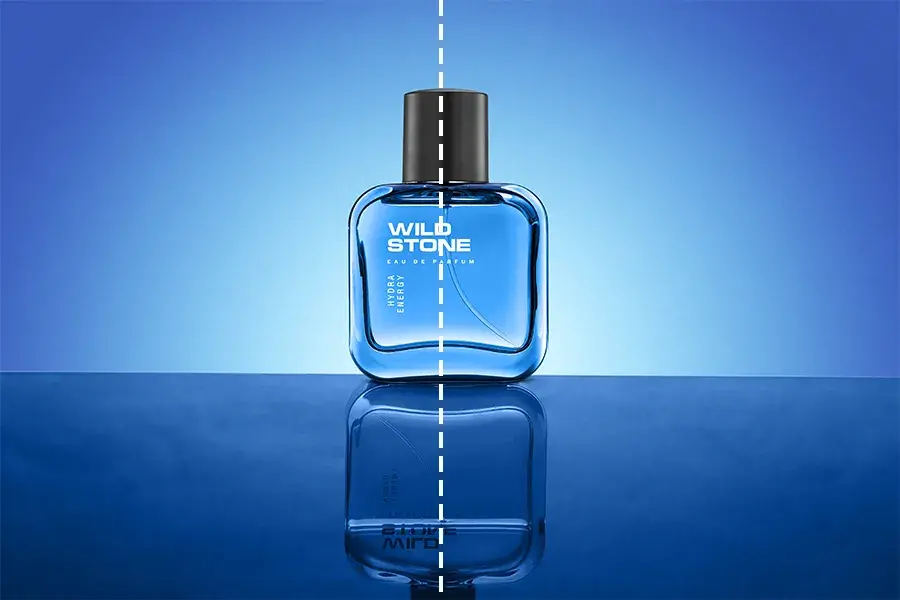
Symmetry means arranging things in a photo so that if you drew a line down the middle, both sides would look the same or very close. It brings a feeling of stability and order, making it perfect for showcasing precise or accurate products.
On the flip side, asymmetry is about purposely putting things off-centre or leaving unequal spaces between elements in a photo. This creates a sense of movement and energy, making it excellent for presenting products that are dynamic or have various parts.
Image Cropping
Cropping is a handy technique in product photography where you cut out parts you don’t want in your picture.
Composition is all about arranging things in a picture to make it look good. When you crop a photo right, you highlight important stuff like the product and keep the focus on that, while getting rid of any unwanted things in the background or in front.
Our Favourite Composition Tricks In Product Photography
Mastering composition in product photography is all about making your subject stand out and grab the viewer’s attention. There are specific tricks to enhance your composition, and you can even mix them to prepare an outstanding product photo.
Highlighting The Product With Front And Central Placement
Sometimes, breaking the usual rules works best. In product photography, it’s often effective to ignore common composition guidelines and put your product right in front and centre. This makes it the star of the show – no distractions, just direct focus.
You can even play with showing only part of the product, making the viewers curious. Whether in the foreground or middle ground, adding depth to your composition is key. Create this depth using clever lighting, colour contrasts, or reflections. The goal is to avoid making your product seem flat; you want it to pop and feel three-dimensional.
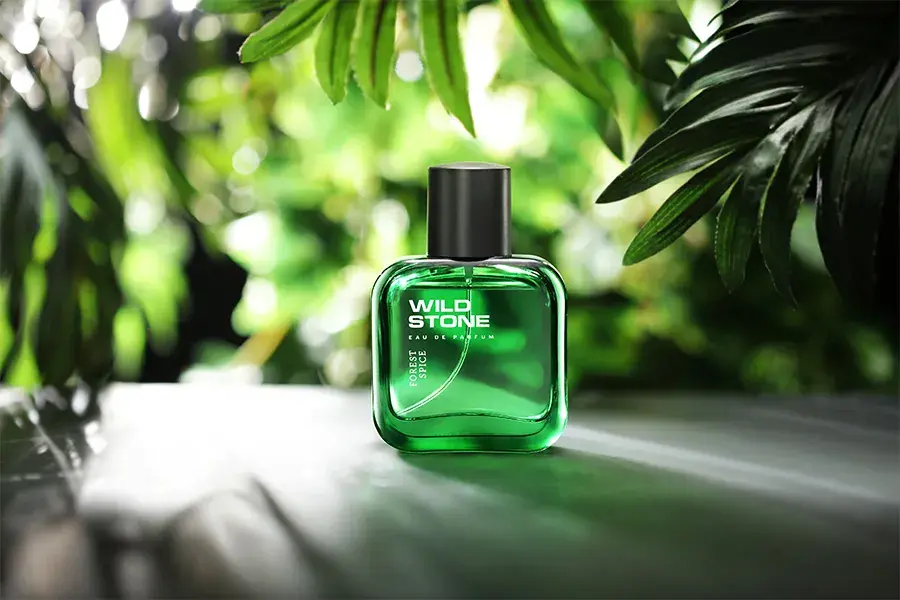
Selecting Camera Angles To Showcase Product Features
Picking the right camera angle can make your products fascinating. A 45-degree downward look, similar to how we see objects on tables and shelves, gives a feeling of realism. It’s like the viewer already owns the product. This angle adds depth and reveals more of the product, showing off its best features. So experiment with angles to find the one that brings out the product’s excellence.
Enhancing Composition With The Rule Of Odds
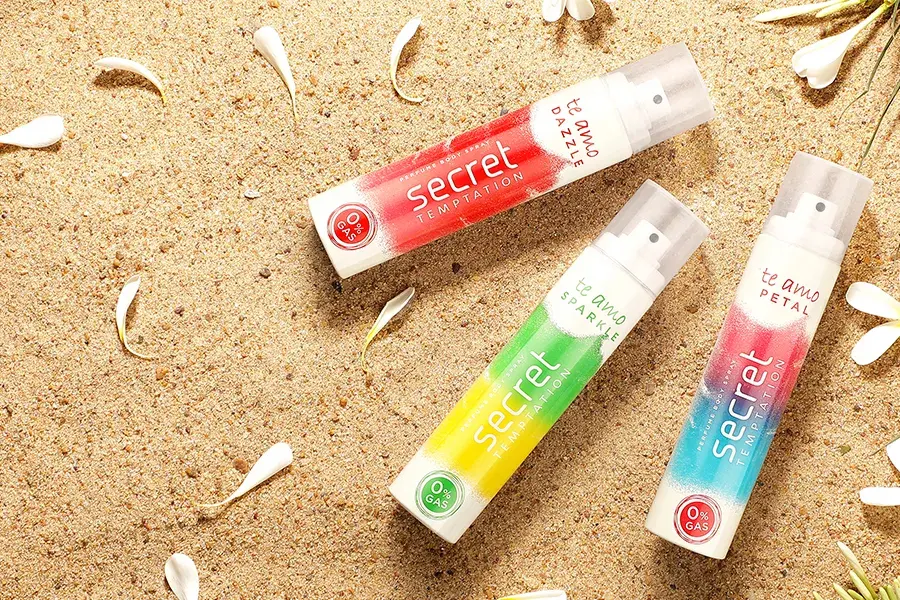
For a more appealing product composition, consider the rule of odds. It operates on a subconscious level, making scenes more interesting. Even numbers can feel dull, while odd numbers create tension and intrigue.
If you’re featuring only one product, add other items to the scene that complements the product. For instance, pairing shaving foam with a towel and a razor tells a story and makes the product more relatable. This technique adds depth and believability to your product presentation.
Capture A Unique View With A Top-down Perspective
Opting for a top-down or flat-lay perspective is an excellent way to showcase your products uniquely. This viewpoint provides a distinctive angle that stands out from the usual 45-degree or straight-on shots, adding excitement and uniqueness to your product presentation.
The top-down approach creates a powerful visual impact, especially when paired with a blurred background for added intensity. This technique, frequently utilized in food photography, allows for creative additions to the scene. By adding extra items, you can transform a simple image into a storytelling composition, giving your audience more than just a plain view.

Download The Beginners Handbook For Product Photography
This handbook is your go-to guide for unleashing your creative potential. Don’t miss out – grab your FREE copy now!
Creating A Story With Light And Shadow
A good product photographer knows how to play with light to tell a great story. Let’s break it down:
You can use light and shadow to make people notice your product. When you make your product bright and let the rest of the scene be darker, people’s eyes naturally go to your product. Imagine you’re taking a picture of a can, and you use light and shadow to make the can really stand out.
But here’s the trick: you can’t just light up your product and leave everything else in the dark. You have to find the right balance between light and shadow to make the picture look good. Mixing light and dark adds a cool 3D effect and makes people focus on your product.
Also, think about the mood you want. Sometimes, using strong light to make your product shine can be intense, like in a dramatic movie scene. But if your product is something gentle, like baby stuff, you might want to use softer light to keep a calm feeling in the picture.
You can learn the use of hard and soft lighting here: Hard light and soft light
Conclusion
Creating great product photos doesn’t have to be hard. Hopefully, these techniques and tips have given you lots of easy ways to make your pictures look better. These are just a few of the things we like to do but don’t be afraid to try new stuff and keep learning.
You can even mix different ideas to make your photos even cooler and more eye-catching.
Which of these product photography composition techniques are you going to try? Let us know in our WhatsApp Photography Community and you can also ask if you have any doubts there, join here: Community Offer